Window dressing

living room picture window with linen drapery panels

This large set of living room windows show off a lovely view of the valley below. But they needed something to soften the edges and finish the room. A set of richly embroidered linen drapery panels were placed on the outside edge of each window to frame the view. The panels were pleated to pattern using a simple cathedral pleat.

fluted gold drapery rod with linen drapery

close up view of embroidered linen drapery

This formal dining room was finished with a set of silk draperies that fully function. The golden wood rods echo the living room in a smaller scale.

dining room table, chandelier, gold draperies

bronze colored silk drapery with goblet pleats on gold wood rod

detail of swarovski crystal chandelier

The master bedroom was finished with a set of embroidered silk ruffled side panels.

red silk drapery framing window in bedroom

red silk drapery panel in master bedroomclose up of ruffled heading on red silk drapery on gold wood rod

We finished a media room with 24 feet of blackout lined motorized drapery in the family room.

embroidered linen draperies

How to enjoy your deck on a drizzly day

How can you enjoy your deck on a drizzly day? With custom curtains of course.

This lovely back yard with a covered patio was well used as a place to relax and enjoy the company of friends and family. But here in the Pacific Northwest it is often difficult to enjoy the mild temperatures of spring and fall with a misty rain or breeze blowing across the yard.

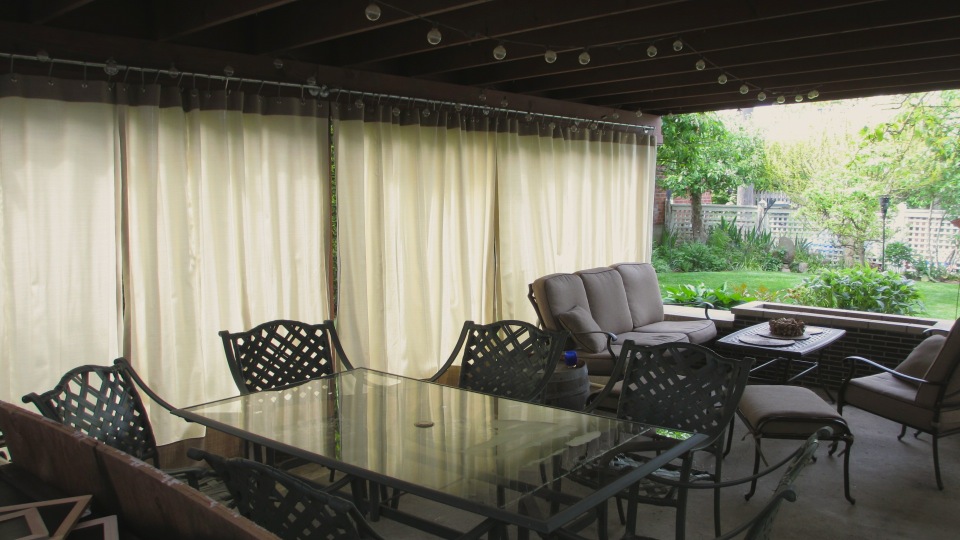
open porchThese curtain panels are made from indoor/outdoor fabric to stand up to the rain and sunshine. We also added a contrast band of fabric at the bottom to keep any signs of dirt to a minimum.


closed porchWhen closed the panels create a warm cozy room that still has a view of the yard.


porch rodThe homeowner put up pipe for rods and found IKEA kitchen S hooks work well to hang the panels. Small grommets at the top make it easy to hang the curtains and to take them down if the weather gets too wild.


outside porchHere is a view from outside the patio. There is a 1/2″ chain in the hem to keep the panels from blowing too much.


porch panelsThis room is now ready for entertaining, enjoying a cozy fire or relaxing with a good book and a glass of wine.


inside porch

The Nanny, a birthday and a doll.

My daughter had an idea for a special birthday gift. She has a darling girl in her care several days a week as she works with and for a young family in Georgia. As the first birthday approached for this little one, Rachael wanted to give a gift that would be fun, meaningful and maybe last for years to come. Her idea was to give the book series of “The Lion, the Witch and the Wardrobe”. This series was and is a favorite set of stories for all of my children. We have read them aloud as a family and everyone has also enjoyed reading them alone. Age 1 is a little young for these complicated adventures, but it is certainly a series to grow into.

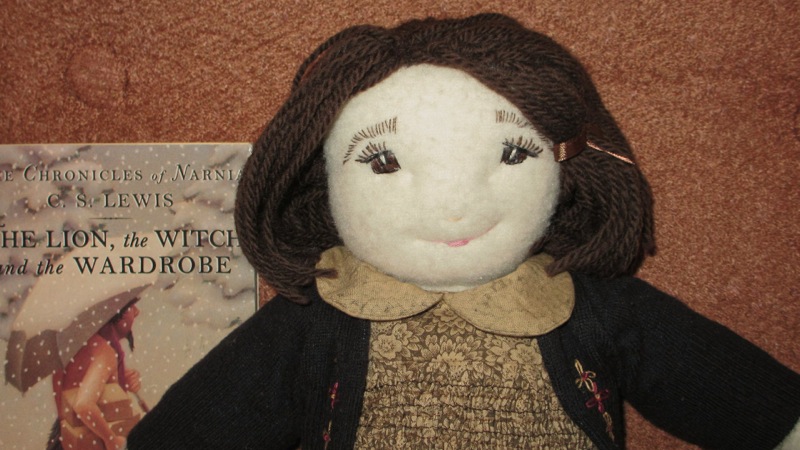
The second part of her idea and gift was for me to make a doll of one of the characters from the stories. We talked it over and settled on ‘Lucy’. I worked on this doll over the course of several weeks sewing a bit in the evenings. I haven’t made a doll from scratch in several years, I felt very out of practice. But this was a fun project. I appreciated the inspiration and lessons from Pinterest.

lucy-by-the-lamp-post-in-narnia  http://sewliberated.typepad.com/sew_liberated/dollhair.html

When ‘Lucy’ was finished, she was packed up and shipped to Georgia arriving just in time for the big day. This little one seemed very happy with her gifts. I hope she enjoys her stories for years to come. Lucy2  Lucy doll

birthday doll

A Design Idea

It all started with a photo on Pinterest from Better Homes and Gardens and a local interior designer.

better homes shade

She had a client looking for ideas for a roman shade for her bathroom. The room was in the middle of an upgrade and remodel. The homeowners were keeping the design and character of this 1920’s home to period. White subway tile covered the walls of the walk-in shower, with small hexagon black and white tile is on the floor.

I showed the photo to the designer, she shared it with her client – they loved it. “But can you make this a top-down-bottom-up shade?” Yes.

tdbuMichelleSince then, this photo of the finished shades has been one of my most repinned photos on Pinterest.This same designer has shared the photo with several other clients. I have now made 4 sets of these shades. Some open both directions. Some only pull up from the bottom.

IMG_1860

serven shade2

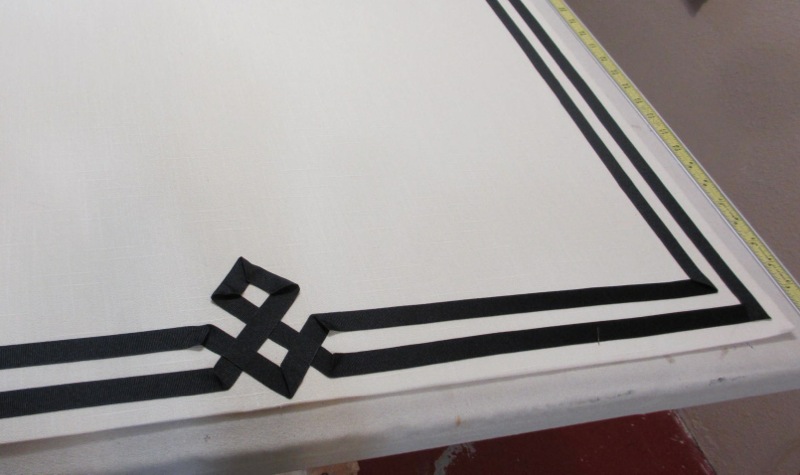
After making the first few sets, I have finally figured out a simpler way of laying down the twill tape. I use an iron on adhesive tape.

iron on

First ironing the tape to the back side of the twill. Then after removing the paper backing,

pattern

I iron the twill tape in place. The twill tape is then carefully topstitched in place.

pinning

I would love to try other designs of twill tape or other trims.

trim ideas


Christmas projects


Every Christmas has its own sewing projects. This year I finished a quilt someone else started and gave it to one daugher. I altered, decorated and added to our Christmas stocking collection. And failed to take any photos of them. I had requests for an apron, which was purchased, a handbag, which is still under construction, and a stuffed whale. I think it is fun that my kids still ask for toys for Christmas even though they are now 25, 23 and 17.

The whale pattern idea came from this blog:  http://valaanvillapaita.blogspot.com/2011/05/tee-se-itse-valas.html

denim whale

This blog is written by someone in Finland. It doesn’t matter that even the translation is hard to follow. The pictures are fun. And if I could knit, it would be tempting to copy other things she has made.

My version is about 24″ long and made out of two different polar fleece type fabrics. It is very soft. This whale now lives on my son’s bed. blue whale

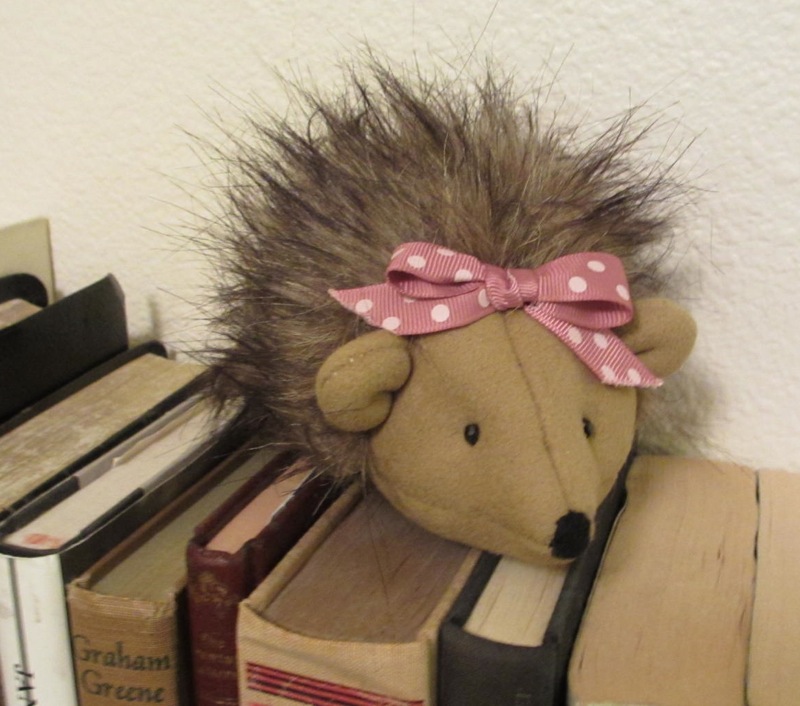
I then decided to make my daughter-in-law this hedgehog, just because. Rachel's hedgehog

This idea came from here: http://maker-land.blogspot.com.au/2012/07/hedgehog-pincushion-tutorial.html?m=1  My version is about the size of a baseball.


pin cushion


Maybe next year I will take more pictures of any new projects and post about them while it is still December.

What did you make this Christmas?


Matching a print

Matching a print is done quite often when sewing with decorator fabric. Making draperies and bedspreads you need large pieces of fabric and the print needs to match across the whole project. But matching the print is also needed on small valances, pillows and sometimes in a garment. When using a quality decorator fabric the print repeat from one edge of the fabric to the other is made to match up with another width of fabric.Using a quilting or dress fabric, matching a print repeat can take a little more work.

Sewing the pieces together can be difficult to see if you place the fabric with the right sides together and stitch on the wrong side. Here is a simpler way to match the print and still see what you are sewing.

matching

You still want to lay your fabrics right sides together. With this embroidered print it is not as obvious which side is the wrong side. I mark my fabric pieces with blue painter’s tape so I know which side is the right side and which edge is the top.

To match the print and still see what you are doing, fold back the edge of the top fabric to a place that makes sense to match up the pattern.

fold back


Line up the print and pin it in place.

match


Take your pinned fabric to the sewing machine and stitch on top.

stitching


You are able to see that the print still matches, nothing is shifting and the bulk of your fabric is to the left of the machine.

sewing table


Take your stitched pieces back to the table and press first on the wrong side where you just stitched. Then open the seam and press on the right side.

front


Now you have a beautifully matched seam.

Have fun.


Curtains By Design